Port Forwarding Basics
Image having a bare metal server at your fingers tips for (almost) free at all times. If you have a regular internet package in your home as opposed to a shared network like dorms and some apparent buildings do you actually can connect your PC, Raspberry Pi, and even some smart routers to the web as a server. The trick is by combining your routers port forwarding with a DNS routing service like Duck DNS.
WARNING
If you connect your computer to the internet, your computer will be connected to the internet. That’s right. The largest attack surface. Your machine will no longer be protected by the firewall. You have been warned.
Your Modem
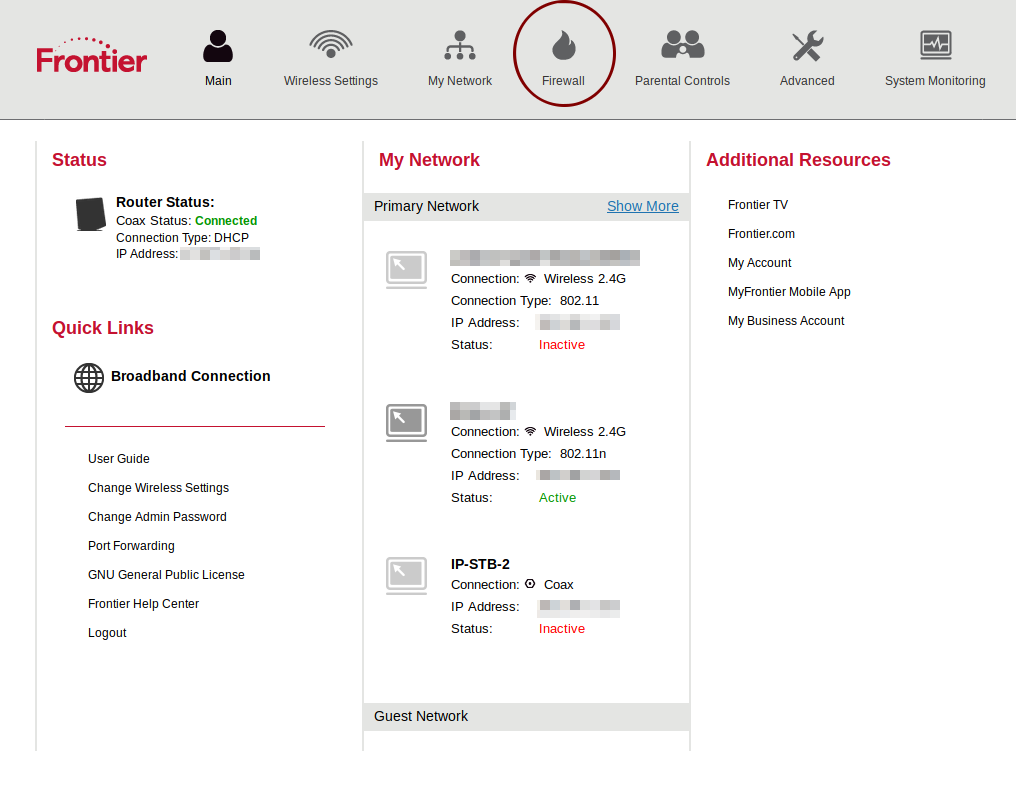
Most modems issued by ISPs have the administration login printed on the site. At the time of writing this I have Frontier and I was able to use 192.168.1.1 as the location of the modem. This might not be the same for you but in my experience that’s usually a default.
Once logged in I was presented with this screen.

Locate the Firewall feature.

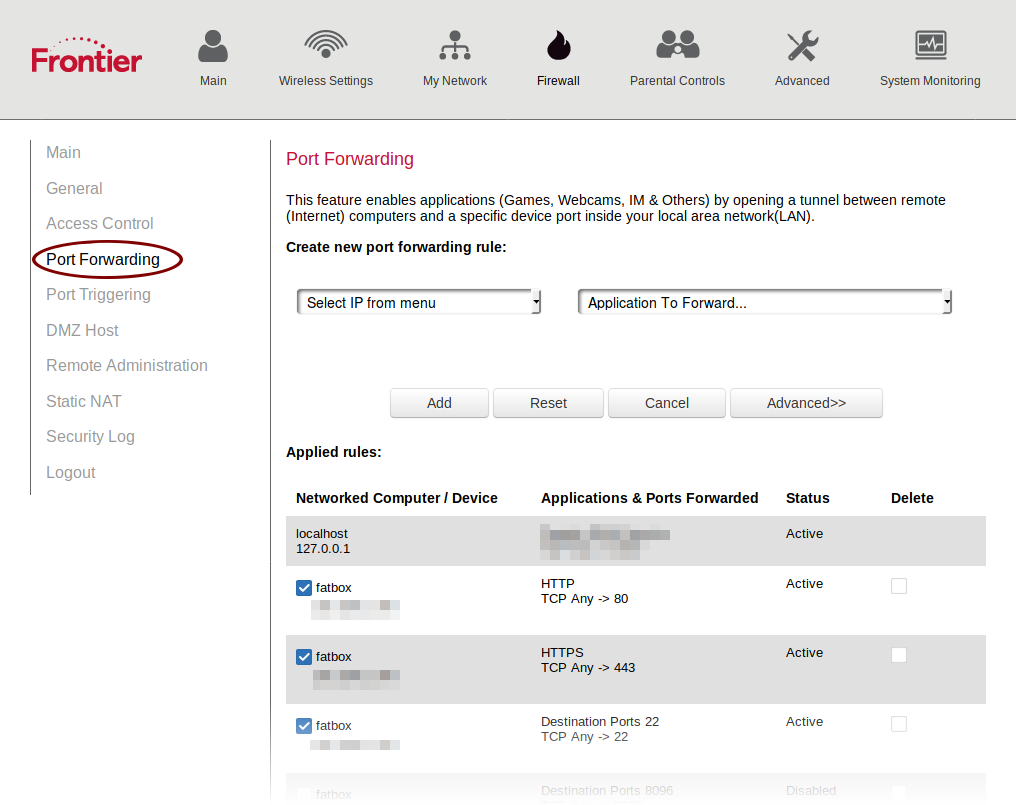
Port forwarding.

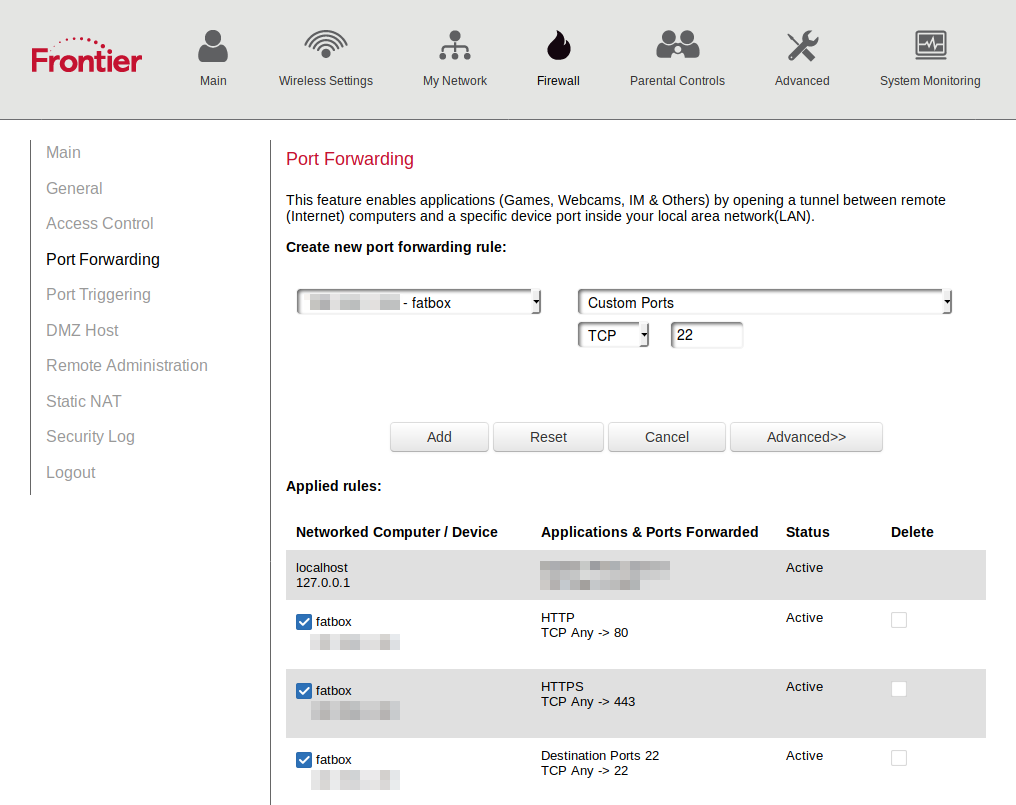
On my modem I was able to pick my machine by name but older ones go by IP address. Keep that in mind as you might have to set your hardware to always select a certain IP.
For this tutorial I was setting up my SSH server so I selected port 22. Save your settings and your local setup is all done.
Duck DNS
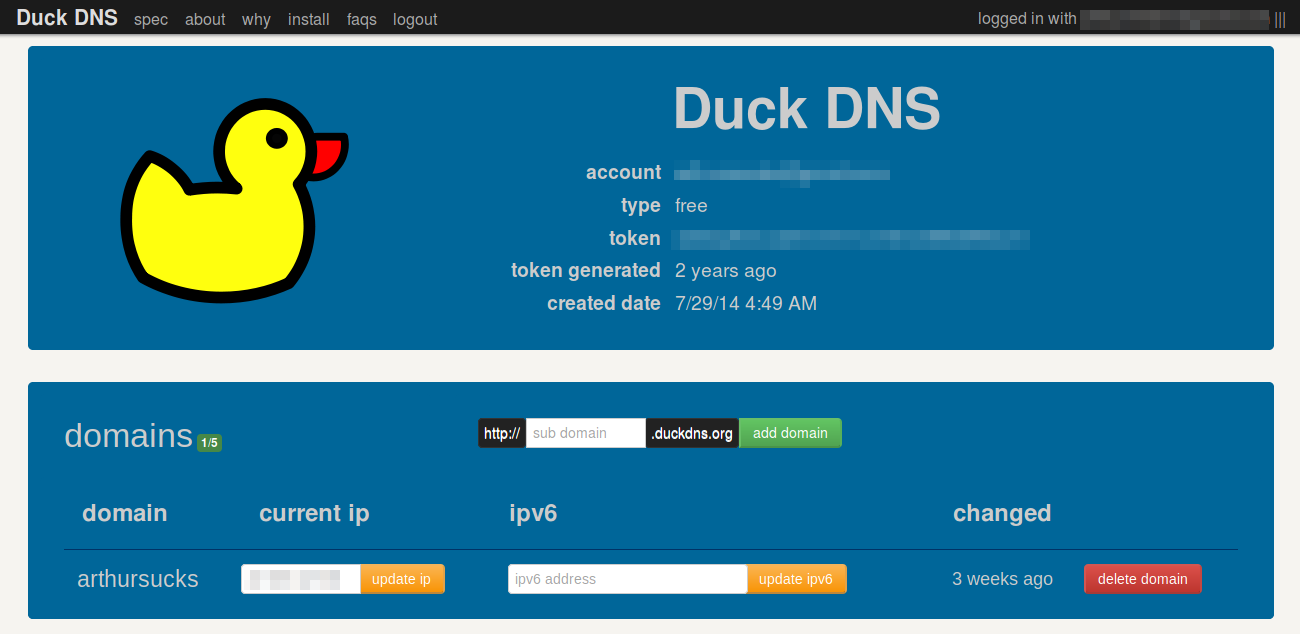
If you have ever heard of Dynamic DNS hosting then you might be familiar with Duck DNS.

Because your public IP address might change periodically you can use applications made by Duck DNS to update the service. The account is free and you simply pick a sub domain to connect to your IP.
That’s basically it. You also have the ability to connect a custom domain to your Duck DNS account by using a CNAME record.
For Example
www.ilikeweasels.org CNAME weasels.duckdns.org